
DOCSINGEST
Ingest a title delivery
Updated 31 October 2026
Ingest brings a title’s masters, trailers, audio, subtitles, artwork, and documents into EYZFlow. An ingest session guides you from collecting files through assigning roles, drafting and approving catalogue information, and processing videos into streams.
Note
You need the View Ingest permission, and Ingest must be included in your plan. To create a session, you also need Create Ingest.
Find an ingest session
- Open Ingest from the sidebar.
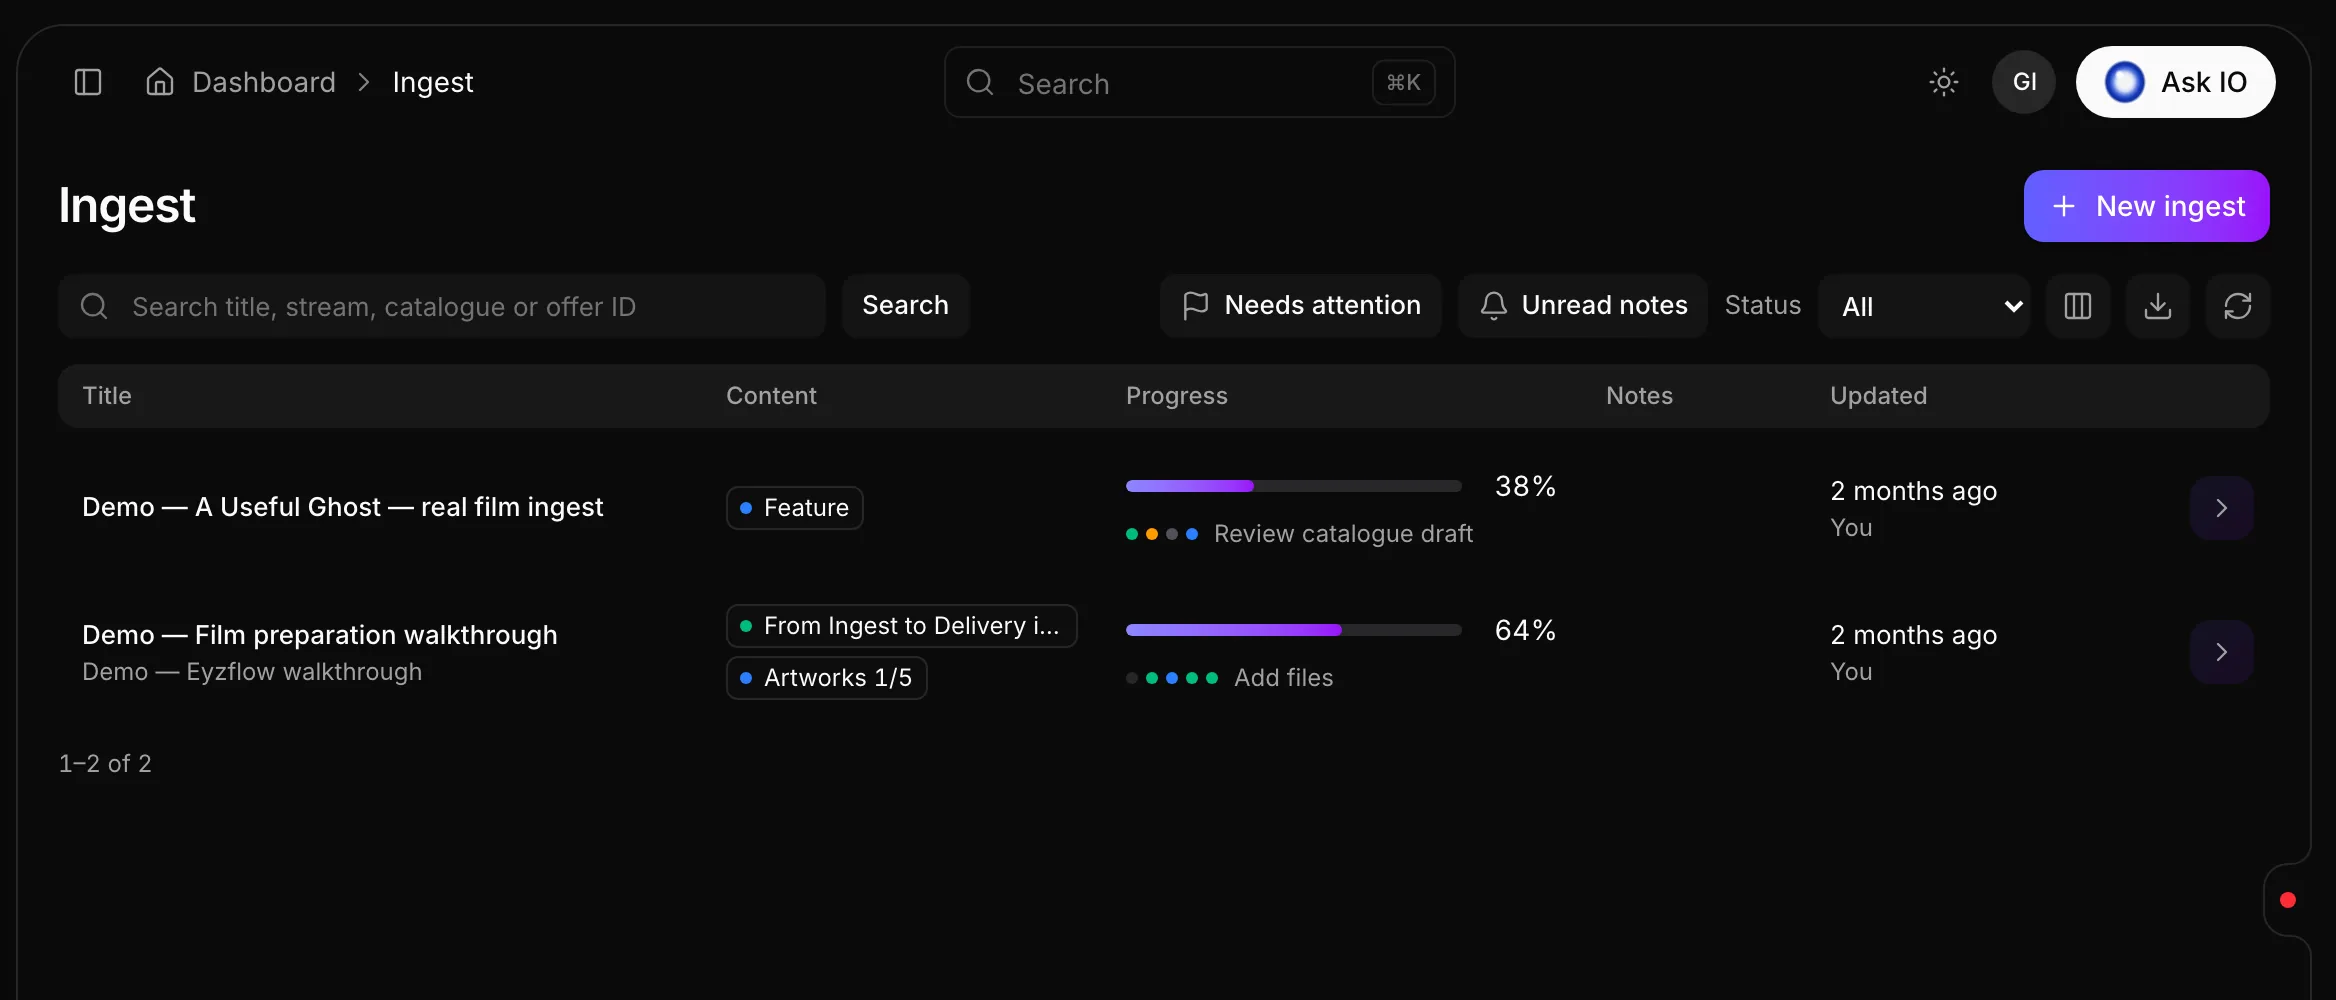
- Search by title, stream, catalogue, or offer ID, then click Search or press Enter.
- Use Needs attention, Unread notes, or Status to narrow the list. Available statuses include Draft, Analyzing, Review, Processing, Ready, Completed, and Failed.
- Select a session to open it.
Each row shows the title and linked catalogue, the content it contains, progress for files, catalogue, artworks, streams, and offers, plus notes and the latest update.
Start an ingest
- On the Ingest page, select New ingest.
- Enter an Ingest title.
- Under Title to ingest, choose one of these options:
- Link existing: choose an offer and catalogue. Linking an offer also links its catalogue. A catalogue already used in another ingest cannot be selected.
- New catalogue: enter the catalogue title and content type. You can also add an IMDb ID, reference URL, and localization languages for the draft.
- Decide later: link a catalogue or offer from the session later.
- Select Continue.
- Optionally add files by uploading them, selecting them from Vault, or selecting them from Bridge.
- Select Create ingest.
The session is saved after you select Continue. If you leave before creating it, open the session from the list to return to the setup steps.
Add files
You can add files while creating an ingest or from the session’s Files card.
- Upload files by dropping them into the upload area or choosing them from your computer.
- From Vault: browse Vault and select a file. Vault files are used in place; they are not copied. You need View Vault.
- From Bridge: choose a licensor, browse that licensor’s uploaded Bridge files, and select Add. You need View Licensors, View Bridge Accounts, and View Bridge Files. Bridge must be enabled for the licensor.
You can also start in Vault. Use Add to ingest for selected files or Ingest this folder for a folder. A folder adds up to 500 files; add any remaining files from the From Vault tab.
Add files from external storage
The External storage card supports FTP, SFTP, and Aspera sources.
- Select an existing storage, or choose Add storage and enter its name, type, address, and sign-in details.
- Browse the source folders and choose Download to storage or Download folder to storage.
- After the download finishes, drag the file onto Files to add it to the session, or onto Catalogue assets to file it with the catalogue.
Credentials are stored encrypted. Refresh file list reads the folder again from the source.
Organize files by role
The session page contains cards for Files, Catalogue, Catalogue assets, Artworks, Streams, and Offers. Drag files from Files to the appropriate card:
- Videos can be assigned to Full Film, Trailer, or an extra stream.
- Press kits, synopses, and metadata sheets can be assigned to Catalogue.
- Images can be assigned to artwork cards.
- Other files can be added to Catalogue assets by choosing Copy or Move.
Extra streams can include Behind the Scenes, Commentary, Deleted & Alternate Content, Interviews, Promotional, Production, Entertainment, Music, or Events.
Dropping a second video onto a stream lets you use it as an audio track, play it before the main video, or play it after the main video. To remove a role, drag the file back to Files. If files need attention, open the Assets panel and use each file’s Role selector, or choose Confirm all roles to accept suggested roles.
Inspect and adjust media
Files are inspected after they arrive. Select a file to view its details or play a preview. For an inspected video, audio, or subtitle file, choose Adjust to make changes before processing.
To review a stream’s video, audio, and subtitles together, choose Adjust on the stream card. Make changes on the shared timeline, then choose Save all. Use Discard all, Undo, or Redo as needed.
Processing uses saved adjustments. A file that has not been inspected is processed exactly as delivered.
Create or update catalogue information
- Add the title’s documents to the Catalogue card.
- Choose Draft catalogue, or choose Choose catalogue to use an existing catalogue.
- Review the documents and add an IMDb reference, reference URL, extra context for the AI, and localization languages as needed.
- Choose Generate draft. The draft includes catalogue information and, for each selected language, a translated title, overview, pitch, and keywords.
- Review and edit the catalogue and localizations.
- Choose Approve catalogue to create the catalogue in your library.
Re-run analysis replaces the current draft, while Discard draft starts over. For an existing catalogue, use Draft update, select the proposed changes to keep, and choose Apply update. The catalogue changes only when you apply the update.
Generating a draft requires Update Ingest. Approving a catalogue or applying an update requires Publish Ingest.
Process a video into a stream
- Place a video on a Full Film, Trailer, or extra stream card.
- Choose Start processing.
- Review the source, packaging, saved adjustments, and any blocking issues in the confirmation dialog.
- Choose Start processing again.
The stream shows Queued or Encoding with progress. When it is ready, you can open or play the stream. To add audio or subtitles, drop the file onto a ready stream; the file is added as a track. Editing audio and subtitle tracks requires Edit Streams.
To process the stream again with newer adjustments, choose Re-run processing and select Full re-run, Audio only, or Subtitles only. A full re-run takes as long as the first encode, and the stream is unavailable to viewers until processing finishes.
Starting and re-running processing require Publish Ingest.
Add artwork and an offer
Artwork
On the Artworks group, choose Add, then select a language, artwork type, and image. You can also drop an image onto an artwork card or use Upload, Replace, or From Vault or Bridge on the card.
Adding or uploading artwork requires Create Artworks. Replacing artwork also requires Edit Artworks.
Offer
On the Offers group, choose Add, then either create an offer or choose an existing offer. Select the offer for the session, then drag a processed stream onto it to attach the stream.
Creating an offer requires Create Offers. Choosing an existing offer requires View Offers.
Leave notes for your team
- On the Files card, select the notes count.
- In Leave a note…, enter the note. Type
@to mention a teammate. - Select Post note.
Opening a session marks its notes as read. Use Unread notes on the Ingest list to find sessions with unread notes. Reading notes does not require update permission, but posting requires Update Ingest.
Looking for a quick answer? Read the FAQ