
DOCSVAULT AND FILE STORAGE
Use Vault files across EYZFlow
Updated 31 October 2026
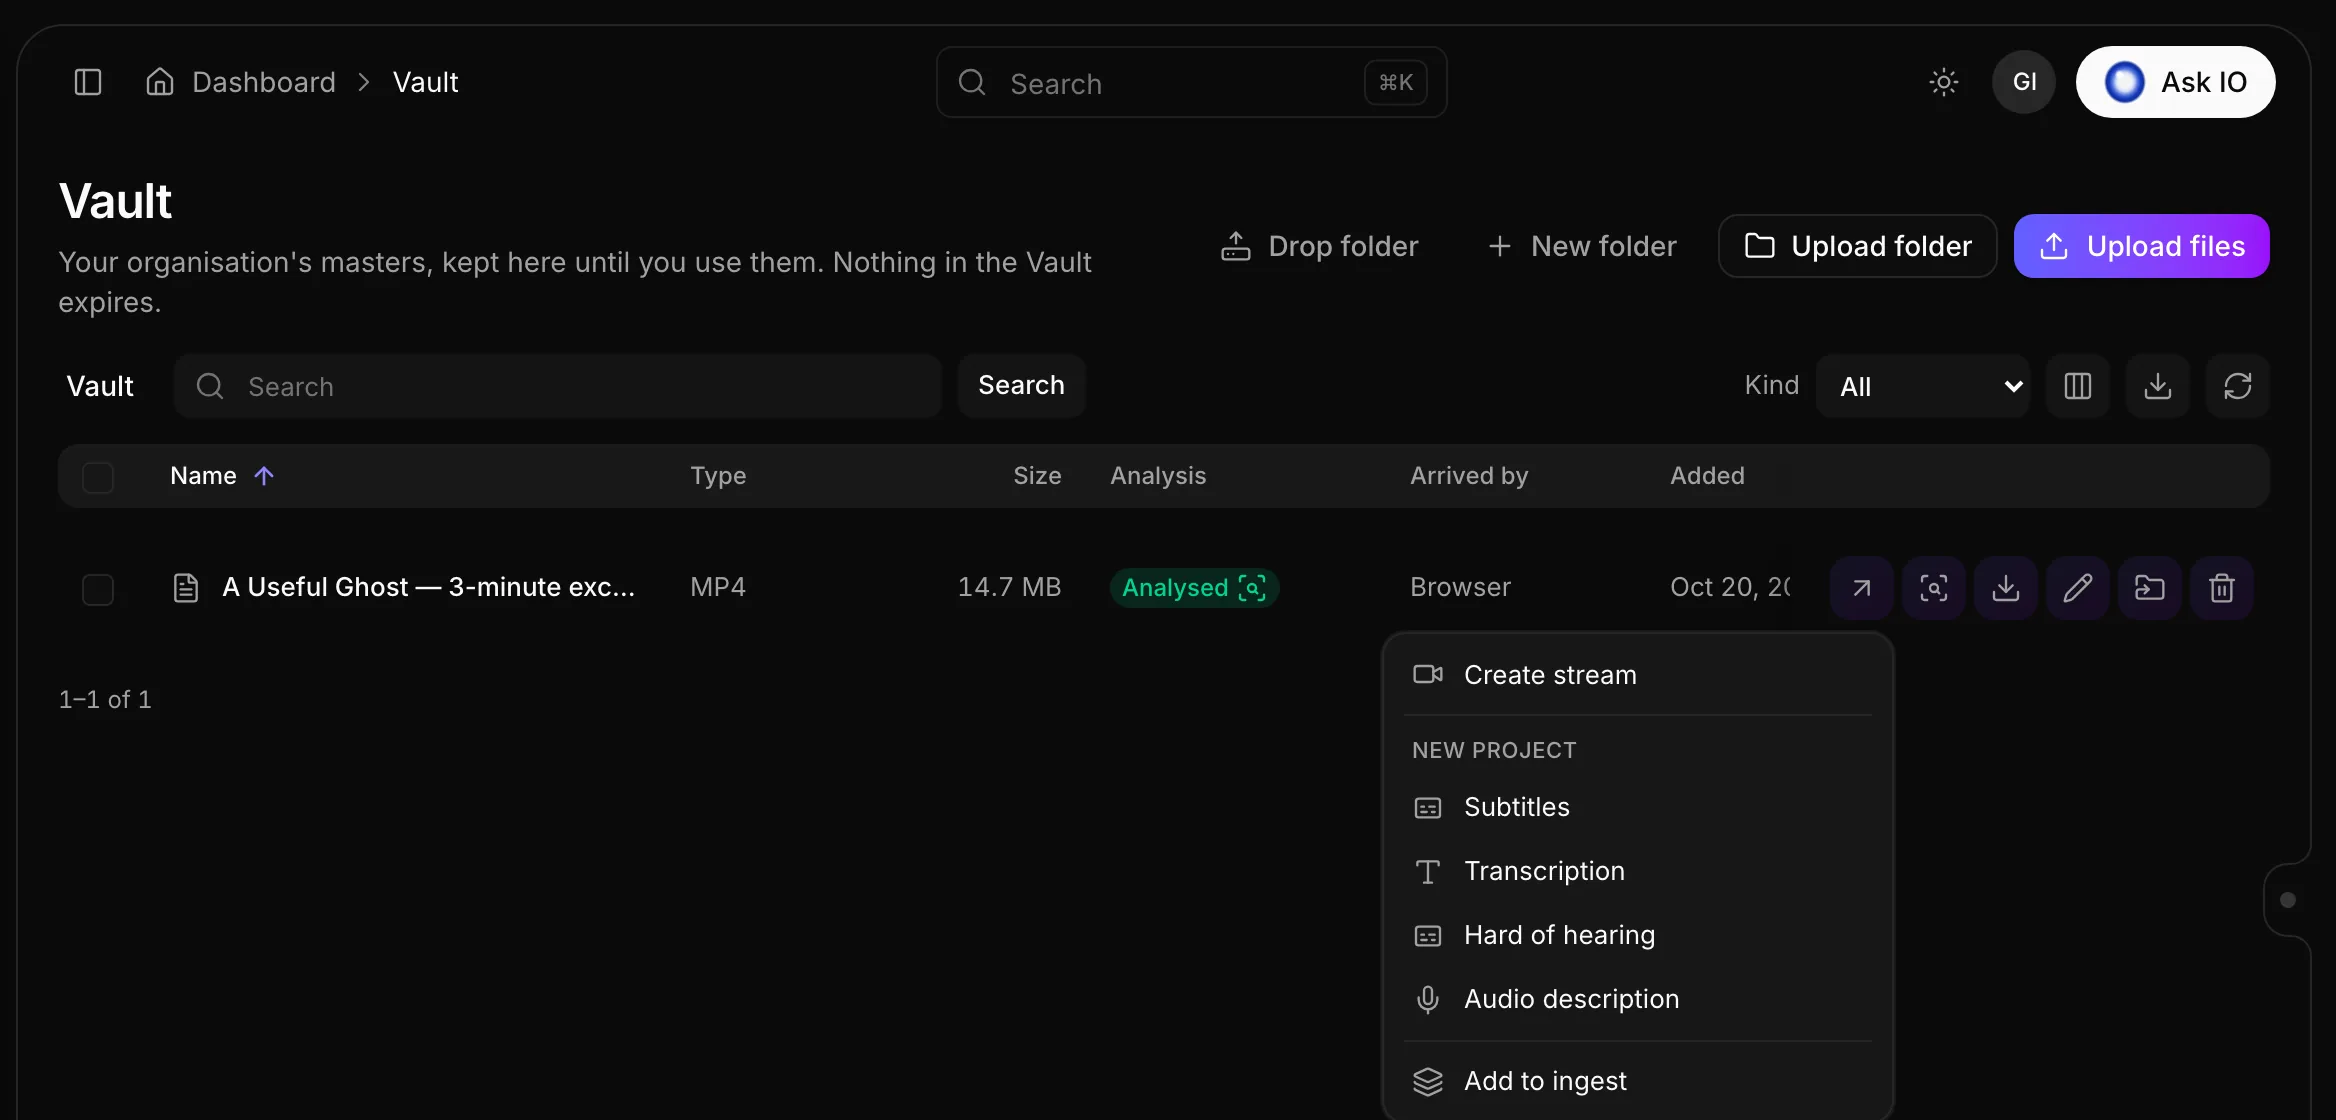
Files stored in the Vault can be used in many EYZFlow features without uploading them again. You can start from the Vault or select a stored file from inside a feature.
Note
You need permission to view the Vault, plus access to the relevant feature and plan module. The available actions depend on the file type and your permissions.
Start from a Vault file
- Open the Vault and find a file that has finished uploading.
- Select Use… on the file's row.
- Choose an action. The destination page opens with the file selected.
Depending on the file type and your access, you may be able to:
- Create a stream from a video.
- Create a Subtitles, Transcription, Hard of hearing, or Audio description project from a video.
- Upload an image as artwork.
- Draft a catalogue with AI from documents.
- Add any file to an ingest.
- Run an eligible workflow with the file.
The menu appears only for completed uploads and shows only actions you can use.
Ingest a whole Vault folder
- In the Vault, find the folder.
- Select Use…, then choose Ingest this folder.
- A new ingest opens with the folder's files and subfolders added.
A folder ingest adds up to 500 files. If the folder contains more, only the first 500 are added; you can add the remaining files from the Vault.
Use multiple Vault files
- Select the files in the Vault.
- Choose an action from the bar above the file list:
- Add to ingest to add several files, without selecting folders, to one ingest.
- Ingest this folder when exactly one folder is selected.
- Draft catalogue with AI when all selected items are documents.
The same feature permissions and plan requirements apply as when starting from a single file.
Start a workflow with a Vault file
- Select Use… on a file and choose Run workflow….
- Choose the workflow and complete its other inputs. The Vault file is already selected.
- Select Start workflow. When the workflow is running, choose Open run to view it.
Only active, non-archived workflows that accept a Vault file are listed. If no eligible workflow exists, the dialog indicates this. Users who can edit workflows may also see an option to create one.
Select a Vault file inside a feature
When a feature asks you to choose a file, look for its Vault option. Common examples include:
- Streams: choose a stored source file, subtitle file, audio track, or artwork image.
- Projects: choose a file from the Vault when creating a subtitles, transcription, Hard of hearing, or Audio description project.
- Ingest: choose files from the Vault for a new ingest, or choose Vault artwork on the ingest canvas.
- Catalogues: add Vault media assets to a title, use Vault documents when drafting a catalogue with AI, or select a Vault image.
- Artworks: choose a stored image.
- Deliveries: choose a stored video file.
- Revenue statements and Prime Video analytics: choose a stored import file.
- Video Intelligence: add Vault audio or images to a video, or choose a Vault video in the context picker.
- Workflows: provide a Vault file wherever a workflow input accepts one.
Files selected from the Vault are generally used where they are rather than uploaded again. Catalogue media assets are an exception: each selected file is copied into the catalogue while the original remains in the Vault.
The Vault tab or option in a picker is available only to users who can view the Vault.
Looking for a quick answer? Read the FAQ