
DOCSBRIDGE FILE EXCHANGE
Bridge upload links: request files from partners
Updated 31 October 2026
Use a Bridge upload link to collect files from anyone, including people who do not have a Bridge account. Files sent through the link land in the Bridge account and target folder you choose.
Important
Anyone with the link can use it. Share a PIN separately when you protect a link with one.
Before you start
You need View Bridge Upload Links to see the upload-link list. You need Manage Bridge Upload Links to create, edit, or revoke links.
Create an upload link
-
In the sidebar, open Bridge > Upload links.
-
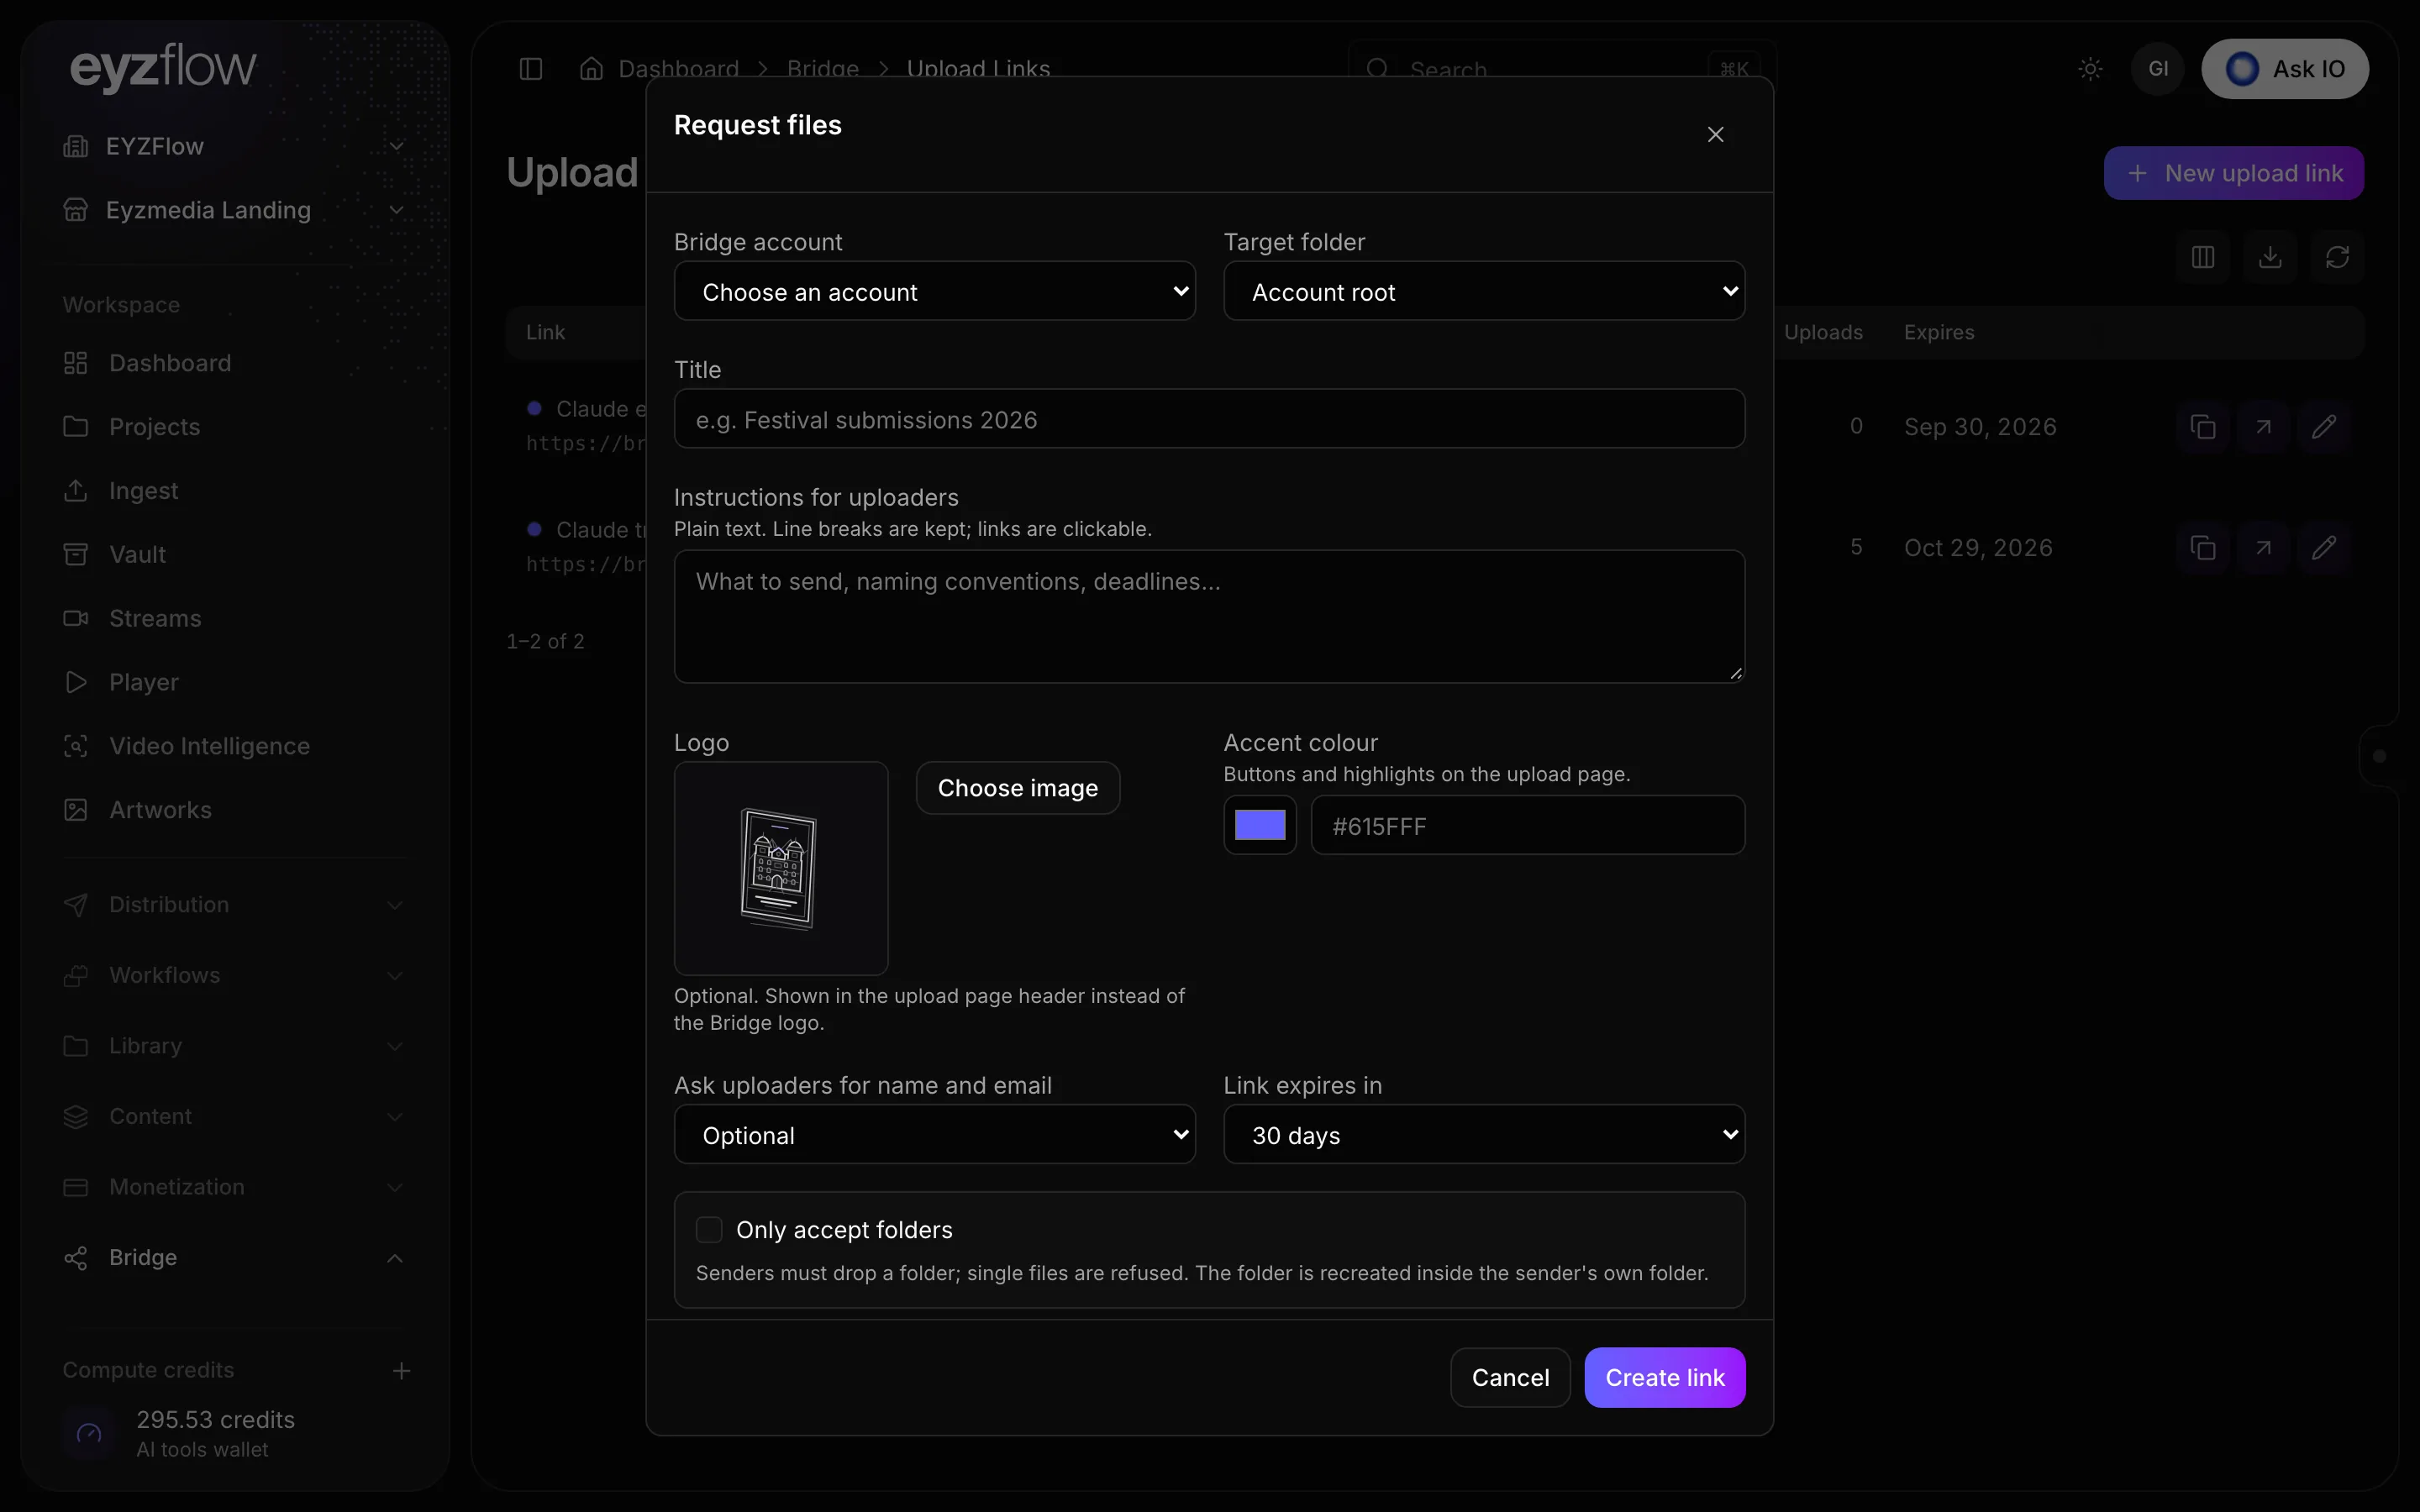
Select New upload link.
-
Choose the active Bridge account where files will be stored.
-
Choose the Target folder, either Account root or a folder in that account.
-
Enter a Title. Optionally add uploader instructions; line breaks are preserved and links are clickable.
-
Optionally choose a Logo and Accent colour.
-
Under Ask uploaders for name and email, choose Optional, Required, or Don't ask.
-
Choose an expiry of 7, 14, 30, 60, or 90 days. The default is 30 days.
-
Configure any limits:
- Only accept folders—senders must submit a folder rather than individual files.
- Protect with a PIN—require the PIN to access the upload page.
- Maximum number of files.
- Maximum file size, in MB or GB.
Leave a limit empty for no limit.
-
Select Create link.
-
On the Upload link ready screen, select Copy to copy the link, or Copy invitation text to copy the title and link together. Select Done when finished.
Protect a link with a PIN
- Enable Protect with a PIN when creating or editing the link.
- Save the link.
- Copy the eight-digit PIN from the next screen and store it safely. It is shown only once.
- Send the PIN separately from the link—for example, by phone or in another message.
A lock appears beside PIN-protected links in the list. To generate a new PIN, edit the link and select Generate a new PIN. To remove PIN protection, clear Protect with a PIN.
Require folders instead of individual files
Enable Only accept folders in the upload-link settings. Senders must then submit a folder; individual files are refused. The submitted folder is recreated inside the sender's own folder in the Bridge account.
Request files for an existing Bridge account folder
- Open the licensor's or collaborator's Bridge tab from Bridge accounts.
- Under Uploaded files, open the destination folder.
- Select Request files.
- Enter the title and configure the other upload-link settings.
- Select Create link, then copy the link from Upload link ready.
The new link also appears under Bridge > Upload links.
Copy or open an existing link
- Open Bridge > Upload links.
- In the link's row, select Copy link or Open upload page.
Edit a link
- Open Bridge > Upload links.
- Select Edit link for the relevant row.
- Change the title, instructions, logo, accent colour, rules, or limits. The Bridge account and target folder cannot be changed.
- Under Link expires in, keep Keep current expiry or choose a number of days counted from today.
- Select Save changes.
If you generate a new PIN, it appears once in a PIN regenerated message.
Revoke a link
- Open Bridge > Upload links.
- Select Revoke link for an active link.
- Confirm the action.
The link becomes Revoked. Files already uploaded remain in place.
Understand the upload-links list
Each row shows the link title and address, a lock when PIN protection is enabled, the destination account, upload rules, upload and file limits, expiry, and status. Statuses can be Active, Revoked, or Expired.
Uploaded files are stored in the link's Bridge account under its target folder. You can view them on the account's Bridge tab or under Bridge files.
Looking for a quick answer? Read the FAQ